
Becoming a Notary Public in New York is not difficult. However, if you are new to the process, it can feel confusing at first.
For that reason, this guide explains each step clearly—from preparing for the exam to getting approved and starting notarizations.
Step 1: Check Exam Dates and Locations
First, visit the New York Department of State website to check the available exam dates, times, and locations:
https://dos.ny.gov/become-notary-public
Some exam dates offer different time options, such as 11:00 AM or 2:00 PM.
There is no registration or appointment required, so you simply review the schedule and choose a date, time, and location that work best for you.
Before finalizing your exam date, make sure you give yourself enough time to prepare.
Depending on how busy you are, two to three weeks of studying is usually enough.
Once you decide, write the exam date, time, and location in your calendar so you stay organized.
Step 2: Prepare for the Notary Exam
You do not need to pay for expensive courses to prepare for the exam. In most cases, free online resources are enough if you study consistently.
As you prepare, focus on New York notary laws, notary duties and responsibilities, prohibited acts, and proper notarization procedures.
Most importantly, download and carefully read the official New York notary laws before attempting any online practice tests.
The New York Department of State website also provides a Frequently Asked Questions (FAQ) section, which is very helpful and should be read carefully as part of your exam preparation.
Step 3: What to Bring on Exam Day
Because exams are first come, first served, it is very important to arrive at least 15 minutes early on exam day.
On the day of the exam, bring a valid government-issued ID, a credit card, and a pencil.
Although pencils are usually provided, bringing your own can be helpful.
When you arrive, there is no check-in desk. Instead, you will go directly to the exam room.
Step 4: Payment and Paperwork
After entering the exam room, you will complete a short form with your name, email address, and payment information.
The exam fee is $15. However, the charge is not processed the same day.
If you pay by credit card, the payment will be deducted within three to five business days after the exam.
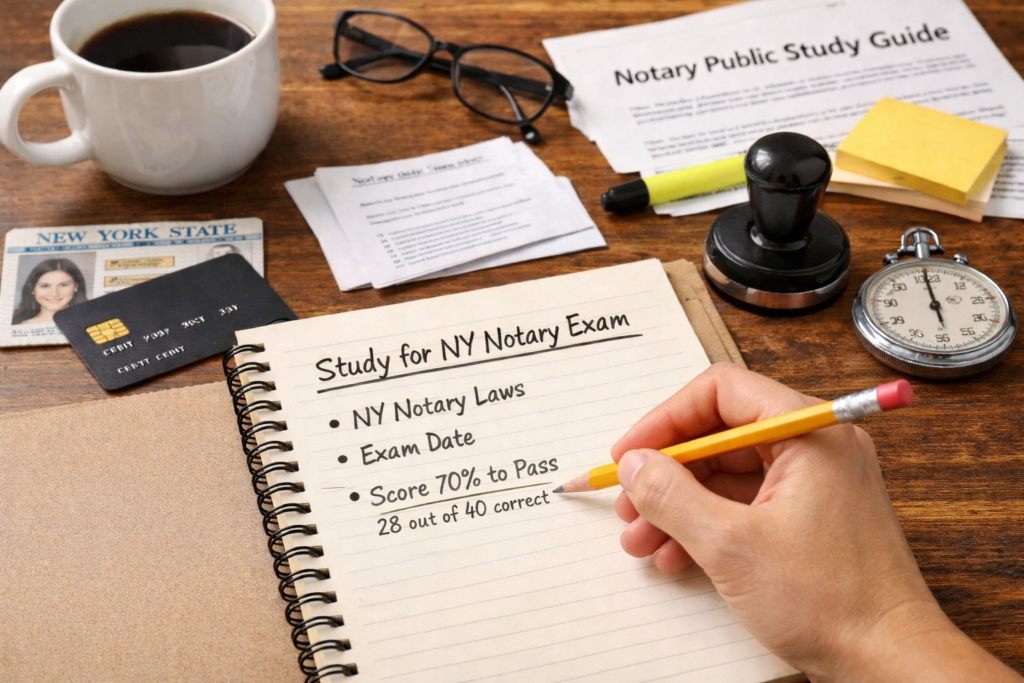
Step 5: Exam Details and Passing Score
The exam consists of 40 multiple-choice questions, and you are given one hour to complete it.
To pass, you must score 70%, which means answering at least 28 questions correctly.
Your result will be reported simply as Pass or Fail.
Overall, the exam tests your knowledge of New York notary laws, ethics, and procedures.
For this reason, studying the official notary handbook is strongly recommended, especially when learning state-specific terms such as acknowledgments and jurats.
Step 6: Receive Your Exam Results
After the exam, you will wait about one month to receive your results by mail.
Once you receive a passing result, apply right away.
Step 7: Apply Through NY Business Express (Traditional Notary)
After passing the exam, you must apply as a Traditional Notary first.
To do this, visit NY Business Express and start the traditional notary application. The application fee is $60.
During the process, you will need to download the Oath of Office form, have it notarized by a local notary, upload the notarized oath, and then submit your application. The oath form can also be downloaded from the Department of State website listed above.
Step 8: Apply for Electronic Notary (Optional)
If you would like to offer electronic notarization, you may apply after you are approved as a traditional notary.
This requires submitting a separate electronic notary application through NY Business Express and paying an additional $60 fee.
In most cases, approval is emailed within one to three business days.
Step 9: After You’re Approved
Once the approval email is received, notarizing can legally begin.
At that point, the notary stamp should be purchased, and the approval letter should be used as proof of commission.
Before moving forward with marketing, it is important to wait until the notary stamp has arrived.
For this reason, a Google Business Profile should not be created too early.
If potential clients call before the stamp is available, appointments may need to be declined, which can create a poor first impression.
After the stamp is received, you are now ready to start your journey as a notary.
At this stage, additional steps may be taken to grow the business, including opening a Google Business Profile, creating a website, and filing an LLC.
Important: No Notary ID Cards in New York
New York no longer issues physical Notary ID cards.
I relied on information published on the New York State official website and the National Notary Association (NNA) website and waited almost one month expecting to receive a Notary ID card. After contacting them directly, I was informed that Notary ID cards are no longer issued.
Instead, the approval letter emailed to you is your official proof of commission.
This information was not clearly updated on those websites at the time, so I am sharing this to help others avoid the same confusion.
Do not wait for an ID card before starting notarizations.